Golden-crisp outside, cloud-soft inside – this homemade crispy double-fried skillet French fries put fast food to shame. These foolproof techniques transform ordinary potatoes into crave-worthy fries with that perfect crunch-then-melt experience in every bite. Once you master this method, you'll never settle for soggy spuds again. Best of all? You control the ingredients – just pure potato perfection that will have everyone reaching for more.

The Story Behind Homemade Skillet French Fries
Is there anything more satisfying than biting into a perfect French fry? That magical combination of crispy exterior giving way to a tender, fluffy inside - it's one of life's simple pleasures that never gets old.
Last night, while preparing BBQ chicken sandwiches to use up some leftover roasted chicken from the weekend, I had a craving for those golden sticks of potato perfection. I decided to make them the old-fashioned way - in hot oil, using the double-fry method I learned years ago as a fry cook at Y'Not Burger. (I know, I know, but it's not like I'm indulging in them every day!)
Since I have a strict rule against single-purpose kitchen gadgets taking up valuable storage space (who needs another appliance collecting dust?), I skipped the deep fryer and used a regular skillet right on my stovetop instead. An electric skillet would actually be preferable for this recipe since it's easier to regulate the cooking temperature, and it can still double as a stand-alone skillet. Still, a standard skillet along with an instant read thermometer works perfectly fine with a bit of attention. Either way, this simple approach turned out to be all I needed for creating these delicious Skillet French Fries.
Note: This post was completely rewritten in February 2025 with updated information and new photos for an even better guide to perfect homemade French fries!
Jump to:
- Fool Proof Double-Fried Crispy Skillet French Fries
- What You Need to Make Crispy Skillet Fries
- Seasonings, Beyond the Salt
- What is the Best Potato to Use for Crispy Skillet Fries?
- The Solution to Crispy French Fries: No More Soggy Spuds
- Professional Secrets to Crispy Fries
- Guided Instructions
- FAQ's
- Mandolin Safety Comes First!
MORE DETAILS ABOUT THIS RECIPE ARE BELOW THE RECIPE CARD

Fool Proof Double-Fried Crispy Skillet French Fries
Equipment
- Electric Skillet optional or
- Instant Read Thermometer if not using Electric Skillet
- Chefs Knife or
Ingredients
- 2 medium russet potatoes I just figure one potato per person, but adjust however you like
- 1- quart vegetable oil Safflower, Peanut, Grapeseed or other neutral oil
- sea salt
- Other flavorings as desired
Instructions
- Peel the potatoes if you prefer a traditional French fry, or leave the skin on for a rustic version. Using a sharp knife or (preferably) a mandolin, cut the potatoes into strips about ¼-inch thick for standard fries. For best results, try to keep the cuts uniform so all your fries cook at the same rate.
- After cutting your potatoes into fries, place in a large bowl and cover completely with ice water. Let them soak for at least one hour, or for best results, transfer the bowl to the refrigerator and soak overnight.Drain the potatoes thoroughly and pat them completely dry with paper towels or a clean kitchen towel before frying. Any excess moisture will cause dangerous oil splattering and prevent proper crisping.
For the First Fry (Blanching the Fries)
- Heat your oil to 325°F (163°C) in your skillet. Working in small batches to avoid overcrowding, carefully add your thoroughly dried potato strips to the hot oil. This first fry isn't about creating crispness - it's about cooking the center until soft and allowing the starches to begin breaking down.
- Fry for about 3-4 minutes until the fries are pale and limp but fully cooked through. They shouldn't take on much color at this stage. You can test one by cutting it in half - the inside should be soft with no crunchiness remaining.Remove the blanched fries with a slotted spoon or spider strainer and place them on a baking sheet lined with paper towels. Allow them to cool completely to room temperature before proceeding to the next step. This cooling period is crucial for texture development. They could also be put into the refrigerator at this point and held overnight.
- After your blanched fries have completely cooled (I find it helpful to place the tray into the refrigerator-bring to room temp before proceeding) increase your oil temperature to 375°F (190°C). This higher heat is crucial for developing that perfect crispy exterior.Working in small batches again to maintain oil temperature, carefully lower the blanched fries back into the hot oil. They'll sizzle more vigorously this time as the moisture on the surface instantly turns to steam, creating that desirable crunchy texture.Fry for approximately 5-7 minutes until the fries turn a beautiful golden brown with crisp edges. Watch carefully as they can go from perfectly golden to too dark quickly at this temperature.
- Use a slotted spoon or spider strainer to remove the finished fries and transfer them to a paper towel-lined plate or tray to drain excess oil. Season immediately while hot for the best flavor absorption.
Notes
A BRIEF HISTORY OF THE HUMBLE POTATO
The potato, now a global staple, faced a surprisingly rocky road to acceptance. Ancient Incas cultivated them around 750 BC, not just for food but for medicine and religious ceremonies (complete with occasional human sacrifices to please potato gods).
When potatoes arrived in Europe via Spanish conquistadors, they met extraordinary resistance. The Scottish found them unholy (not in the Bible), English cooks ruined them by boiling the leaves instead of the tubers, and many feared them as poisonous nightshade relatives.
Enter the French Potato Champion
Their champion emerged in Frenchman Antoine Parmentier, who cleverly promoted potatoes by having royal figures wear potato flowers and strategically "guarding" his potato fields by day but leaving them unguarded at night—encouraging peasants to steal what must be valuable. Meanwhile, during famines, the practical Irish and Germans embraced potatoes out of necessity.
Welcoming the French Fry to America
America only truly fell in love with potatoes after Thomas Jefferson's cultivation efforts and when World War I soldiers returned home craving the "French fries" they'd discovered overseas—transforming the once-feared vegetable into the beloved comfort food we know today.
From a sacrificial deity to a fast-food staple—the potato has come a long way indeed.
What You Need to Make Crispy Skillet Fries

- Potatoes - peeled or unpeeled. Your choice. See the section about potato choices for the best potato picks.
- Oil – You don’t need a high-heat oil since the fries won’t fry above 375ºF, but you do want a clean, neutral-tasting oil. Good options include sunflower or peanut oil for the best flavor and crispiness.
- Salt, or other seasonings.
Yep, that's it.
Seasonings, Beyond the Salt
Beyond basic salt, here are some easy and delicious seasonings for your skillet French fries:
Classic Enhancements:
- Smoked paprika
- Cajun seasoning blend
- Old Bay seasoning
- Rosemary and sea salt
- Italian herb blend
- Garlic Salt
Cheese Options:
- Grated Parmesan (add while hot)
- Nutritional yeast (for a dairy-free cheesy flavor)
Spicy Variations:
- Chili powder + cumin
- Cayenne + black pepper
- Taco seasoning
- Buffalo seasoning
Global Flavors:
- Za'atar (Middle Eastern herb blend)
- Curry powder
- Ranch seasoning powder
- Montreal steak seasoning
- Furikake (Japanese seaweed and sesame blend)
For the best flavor, toss your fries with your chosen seasonings immediately after they come out of the hot oil while they're still slightly wet. This helps the seasonings stick better than adding them later.
You can also create a signature "fry dip" by mixing mayo with any of these seasonings for an extra flavor boost! Or serve with your own homemade Ketchup, or Chili Cheese Fries anyone? An American Classic.
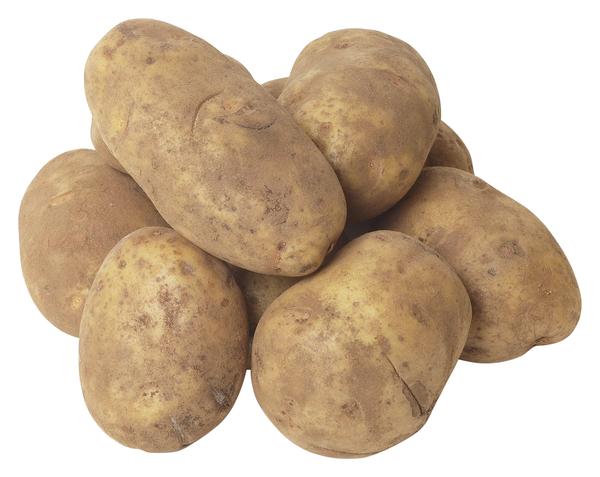
What is the Best Potato to Use for Crispy Skillet Fries?
For truly crispy skillet fries, Russet potatoes (also called Idaho potatoes) are your best choice. They have high starch content and relatively low moisture, which is exactly what you want for that perfect exterior crunch and fluffy interior.
In the UK: Look for potatoes labeled as "baking potatoes" or specifically "Maris Piper" potatoes. These have similar high starch and low moisture characteristics that make them excellent for crispy French fries.
In Australia: The closest equivalent would be potatoes labeled as "brushed potatoes" or "Sebago" potatoes. These are high-starch varieties that work well for frying. Coliban potatoes are another suitable option commonly found in Australian markets
Yukon Golds would be my second choice. They're a bit waxier and have a naturally buttery flavor, which some people prefer. They'll still crisp up nicely, though not quite as dramatically as Russets.
Avoid waxy potatoes like red potatoes or new potatoes - their higher moisture and lower starch content make them better for roasting or potato salads, but they'll typically produce soggy rather than crispy fries.
One pro tip: No matter which potato you choose, soak your cut fries in cold water for at least 30 minutes (or up to overnight in the refrigerator) before frying. This removes excess surface starch and significantly improves crispiness. Just again, remember to dry them thoroughly before starting the frying process.
The Solution to Crispy French Fries: No More Soggy Spuds
The Sugar-Starch Problem
The main enemy of crispy fries is the natural sugar in potatoes. When fresh potatoes hit hot oil, these sugars brown too quickly, leaving you with fries that are dark on the outside but undercooked inside. The key is converting those sugars to starches before cooking.
Professional Secrets to Crispy Fries
The Aging Method
McDonald's discovered that aging potatoes for about 3 weeks helps convert sugars to starches naturally. This is why their fries achieve that consistent golden color and crispness.
If you don't have three weeks to age your potatoes...
Use The Double-Fry Technique
This Belgian method—used at Y'Not Burger in Perris, CA and by professional chefs worldwide—is the gold standard:
- First Fry (Blanching): Cook potatoes at a lower temperature (around 325°F/165°C) for about 3-4 minutes. This cooks the inside without browning the outside too much.
- Rest Period: Remove and allow to cool completely. This can be for 30 minutes or even overnight in the refrigerator.
- Second Fry (Finishing): Drop the pre-fried potatoes into hotter oil (375°F/190°C) for 3-5 minutes until golden and crispy.
- : Remember that thoroughly drying your potatoes before frying is essential—water and hot oil are enemies!
With these techniques, you'll achieve restaurant-quality fries with that perfect crisp-fluffy contrast every time.
Guided Instructions

Peel the potatoes if you prefer a traditional French fry, or leave the skin on for a rustic version with extra nutrients. Using a sharp knife or (preferably) a mandolin, cut the potatoes into strips about ¼-inch thick for standard fries. For best results, try to keep the cuts uniform so all your fries cook at the same rate.

After cutting your potatoes into fries, place them in a large bowl and cover completely with ice water. Let them soak for at least one hour, or for best results, transfer the bowl to the refrigerator and soak overnight. This professional technique (straight from my days at Y'Not Burger, where we kept big buckets of cut potatoes in the walk-in cooler) helps remove excess starch, which is crucial for achieving that perfect crispy exterior.

After soaking, drain the potatoes thoroughly and pat them completely dry with paper towels or a clean kitchen towel before frying. Any excess moisture will cause dangerous oil splattering and prevent proper crisping.
First Fry (The Blanching Stage):
Heat your oil to 325°F (163°C) in your skillet. Working in small batches to avoid overcrowding, carefully add your thoroughly dried potato strips to the hot oil. This first fry isn't about creating crispness - it's about cooking the center until soft and allowing the starches to begin breaking down.

Fry for about 3-4 minutes until the fries are pale and limp but fully cooked through. They shouldn't take on much color at this stage. You can test one by cutting it in half - the inside should be soft with no crunchiness remaining.
Remove the blanched fries with a slotted spoon or spider strainer and place them on a baking sheet lined with paper towels. Allow them to cool completely to room temperature before proceeding to the next step. This cooling period is crucial for texture development. They could also be put into the refrigerator at this point and held overnight.

Second Fry (The Crisping Stage):
After your blanched fries have completely cooled (patience is key here!), increase your oil temperature to 375°F (190°C). This higher heat is crucial for developing that perfect crispy exterior.
Working in small batches again to maintain oil temperature, carefully lower the blanched fries back into the hot oil. They'll sizzle more vigorously this time as the moisture on the surface instantly turns to steam, creating that desirable crunchy texture.
Fry for approximately 5-7 minutes until the fries turn a beautiful golden brown with crisp edges. Watch them carefully as they can go from perfectly golden to too dark quite quickly at this temperature.

Use a slotted spoon or spider strainer to remove the finished fries and transfer them to a paper towel-lined plate or tray to drain excess oil. Season immediately while hot for the best flavor absorption.

Perfectly crispy outsides and fluffy inside.
FAQ's
Yes, you can absolutely reuse the oil from making French fries! In fact, many cooks find that properly filtered oil that's been used once or twice actually produces better results.
For best practices when reusing oil:
Allow the oil to cool completely after frying
Strain it through a fine-mesh sieve lined with cheesecloth or coffee filters to remove food particles
Store in an airtight container in a cool, dark place (or the refrigerator for longer storage)
Keep track of how many times you've used it - most oils can be reused 3-4 times for frying potatoes
Signs that oil should be discarded:
It smells rancid or "off"
The color has darkened significantly
It smokes at a lower temperature than when fresh
There's a noticeable change in viscosity
It foams excessively when used
Absolutely! While the final frying step should happen right before serving to ensure maximum crispness, you have two excellent make-ahead options:
After Cutting: Once you've cut your potatoes into fries, you can store them completely submerged in cold water in the refrigerator for up to 24 hours. This not only makes prep convenient but actually improves your fries by giving them extra time to release their starch.
After First Fry: For even more convenience, you can complete the first "blanching" fry (at 325°F/163°C), then cool the fries completely and refrigerate them, covered, on a baking sheet for up to 1-2 days. This method gives you a significant head start - when guests arrive, you'll only need to do the quick final fry at 375°F/190°C.
This two-stage approach is actually a professional restaurant technique that allows for quick service during busy periods. Just be sure to let refrigerated blanched fries come to room temperature for about 20-30 minutes before the final fry for the best results.
Mandolin Safety Comes First!
Mandolin Safety Tips:
- When practical, use the hand guard that comes with your mandolin. This plastic holder grips the potato while keeping your fingers safely away from the blade.
- If your mandolin didn't come with a guard, or the recipe needs a more gentle touch such as Zucchini Spaghetti, invest in a pair of cut-resistant gloves. They're inexpensive and can prevent serious injuries.
- Set your mandolin on a stable, non-slip surface or use one that hooks securely over a bowl.
- For French fries, first slice the potato into planks using the straight blade, then rotate and slice again to create strips.
- If your mandolin comes with a large julienne attachment, you can create perfect French fry strips in a single pass. Simply secure the julienne blade according to the manufacturer's instructions, then slide the potato across it using the hand guard for consistent, stick-shaped cuts.
- Never try to slice the last bit of potato with your fingers—either use the guard until the end or save that piece for another use.
- Clean your mandolin carefully, wiping in the direction of the blade rather than across it.
Remember, uniform cuts ensure even cooking. Aim for consistency in thickness so all your fries crisp up at the same rate.
Mandy G says
I usually bake homemade fries and they never turn out very well, shrinking too much with excess oil. Tonight I looked up "pan-fried fries" and this recipe showed up at the top of the results. I was glad to see it called for an electric skillet because I have one and it's great for controlling temp. The idea of frying each batch twice, allowing the fries to cool and drain, then the second time at a slightly higher temp, intrigued me! Oh my goodness, the results were superb!!! The outside so crisp, and inside hot and fluffy! These fries made the meal tonight. This is the only french fry recipe I will ever need! Thank youuuu!!!
Paula says
Skillet French Fries
Oh my, perfection! And no oil fire! Thanks, Lindy
LindySez says
Welcome! Nothing quite like fresh hot french fries is there??? Cheers
Mandy G says
Hey Paula, your positive review helped me decide to try this recipe, and it was even better than I imagined! You were right on point with describing it as "perfection". Thank you so much!